


Description
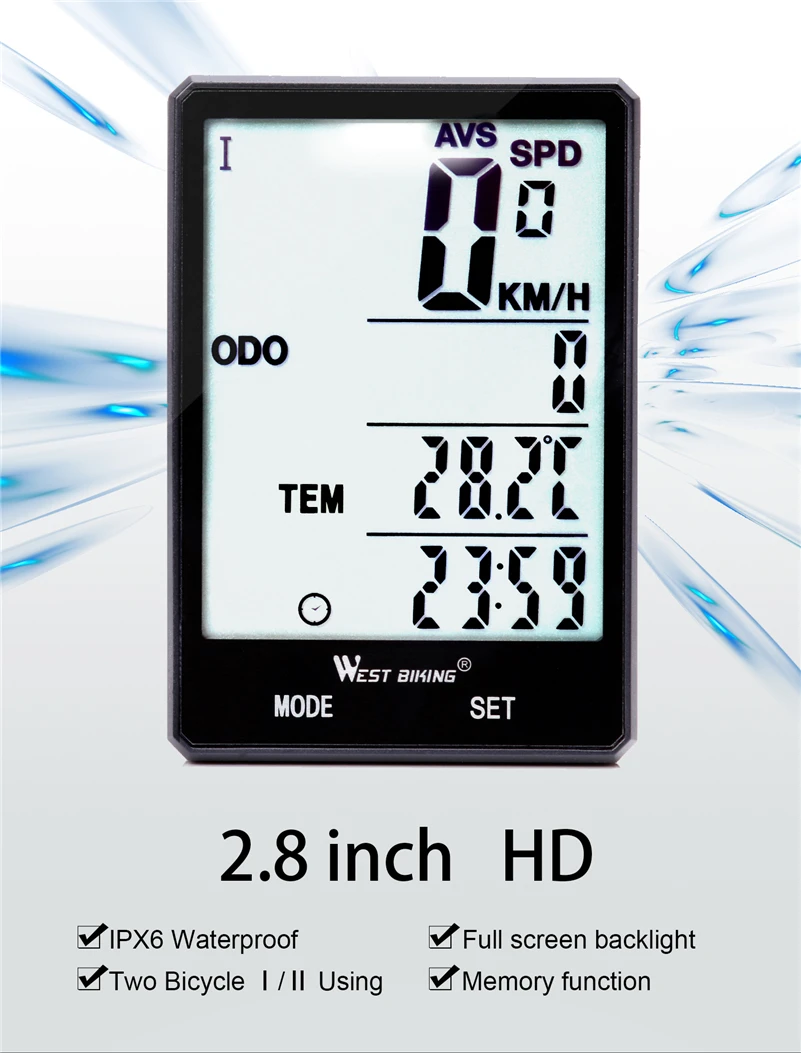
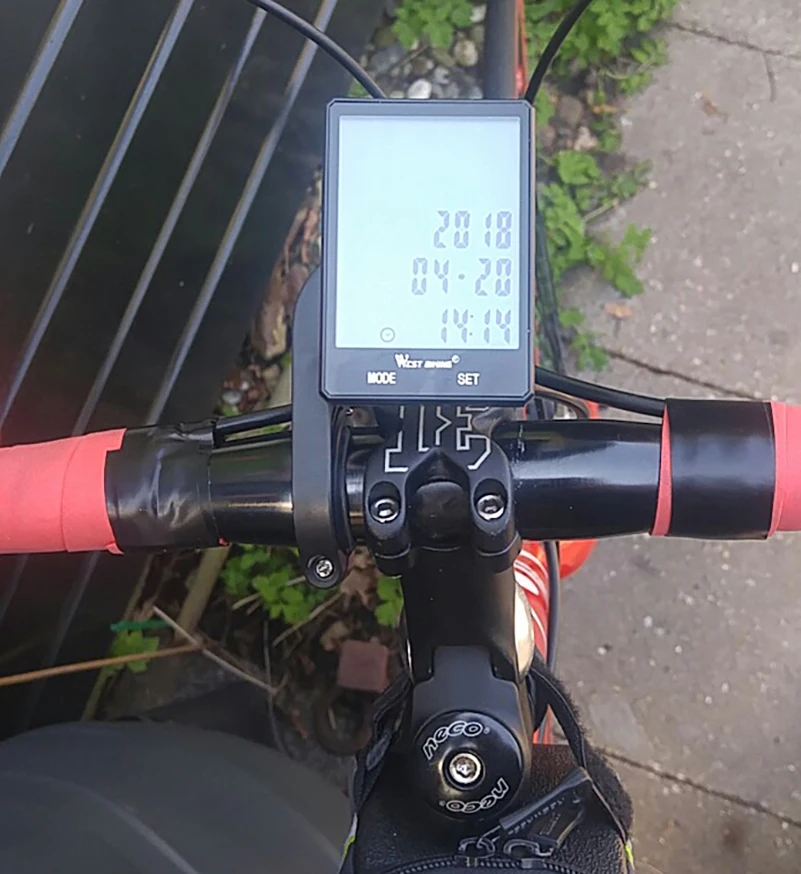
Stay on track with the Cycling Speedometer Digital Large Screen. This high-tech device accurately tracks your speed and distance, making it easier to achieve your fitness goals. With its large digital display, you can easily read your stats on the go. Perfect for cyclists of all levels.
Specifications
- Stopwatch and Accessories: Wireless Stopwatch
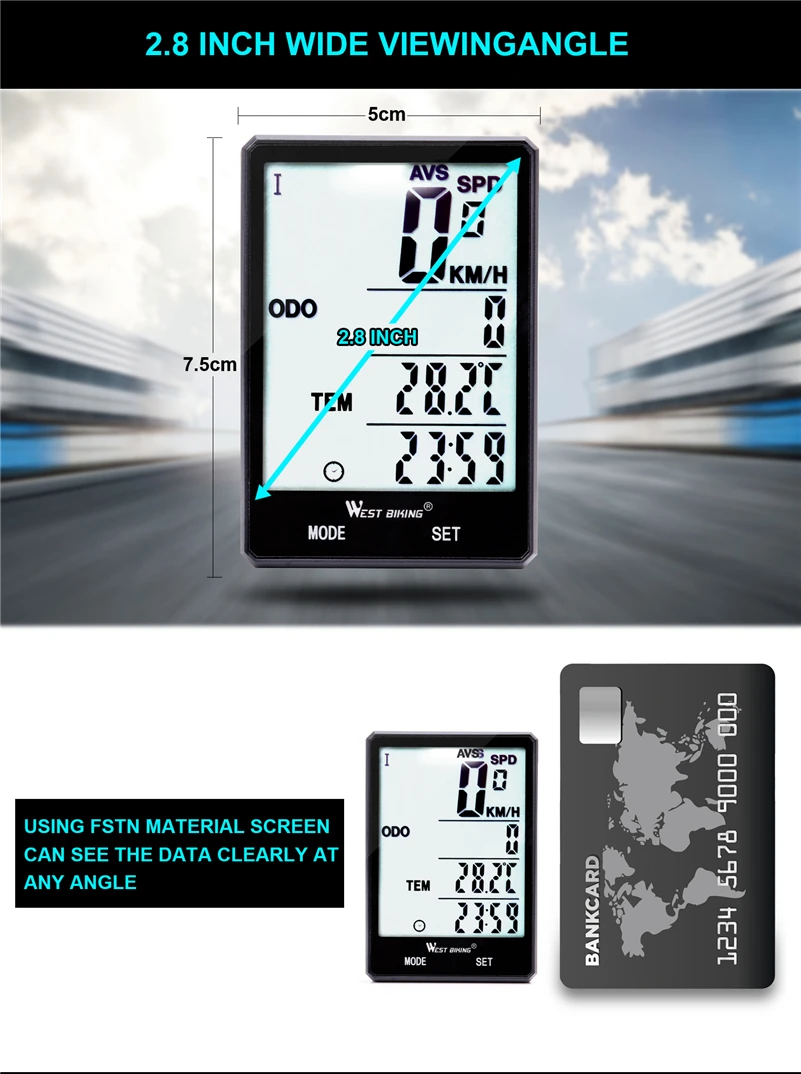
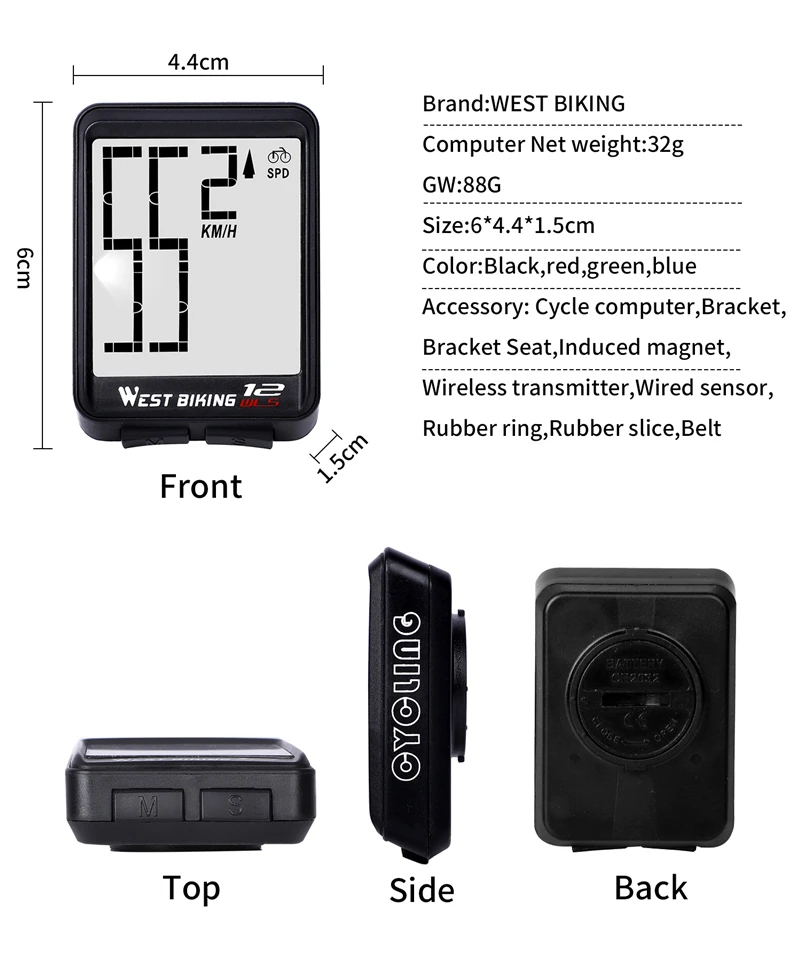
- Size: About 75mm * 50mm * 13mm
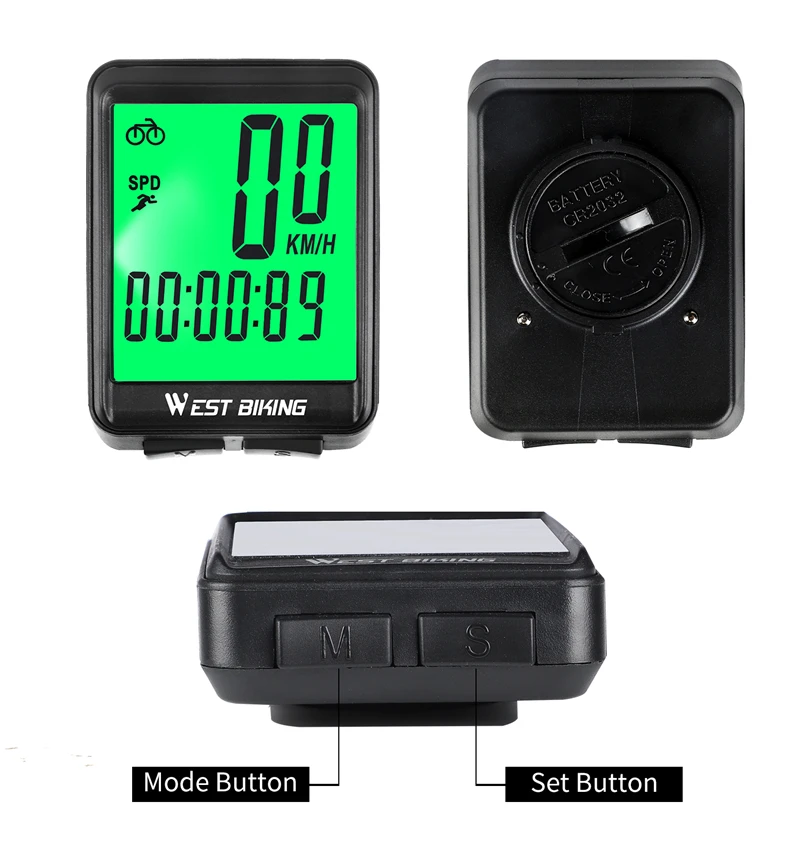
- Power Supply: 2032 Button Cell
- Fit Position: Bicycle Handlebar
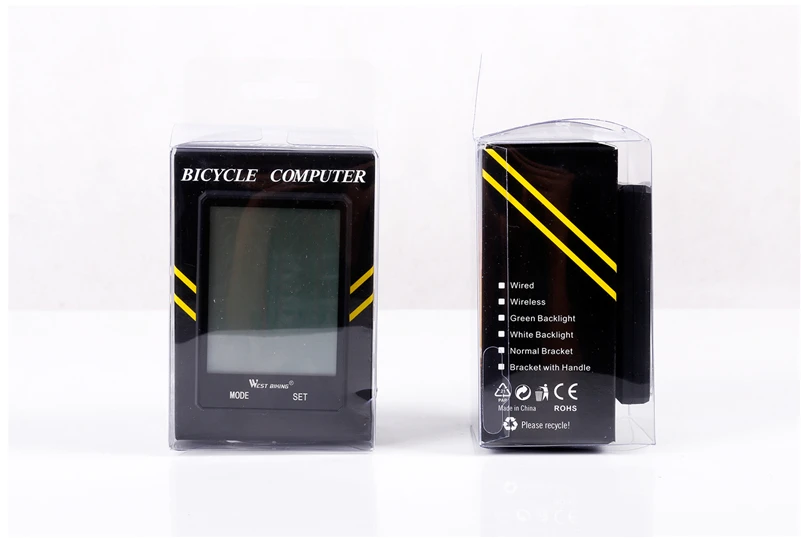
- Bike Computer Style: Wired and Wireless
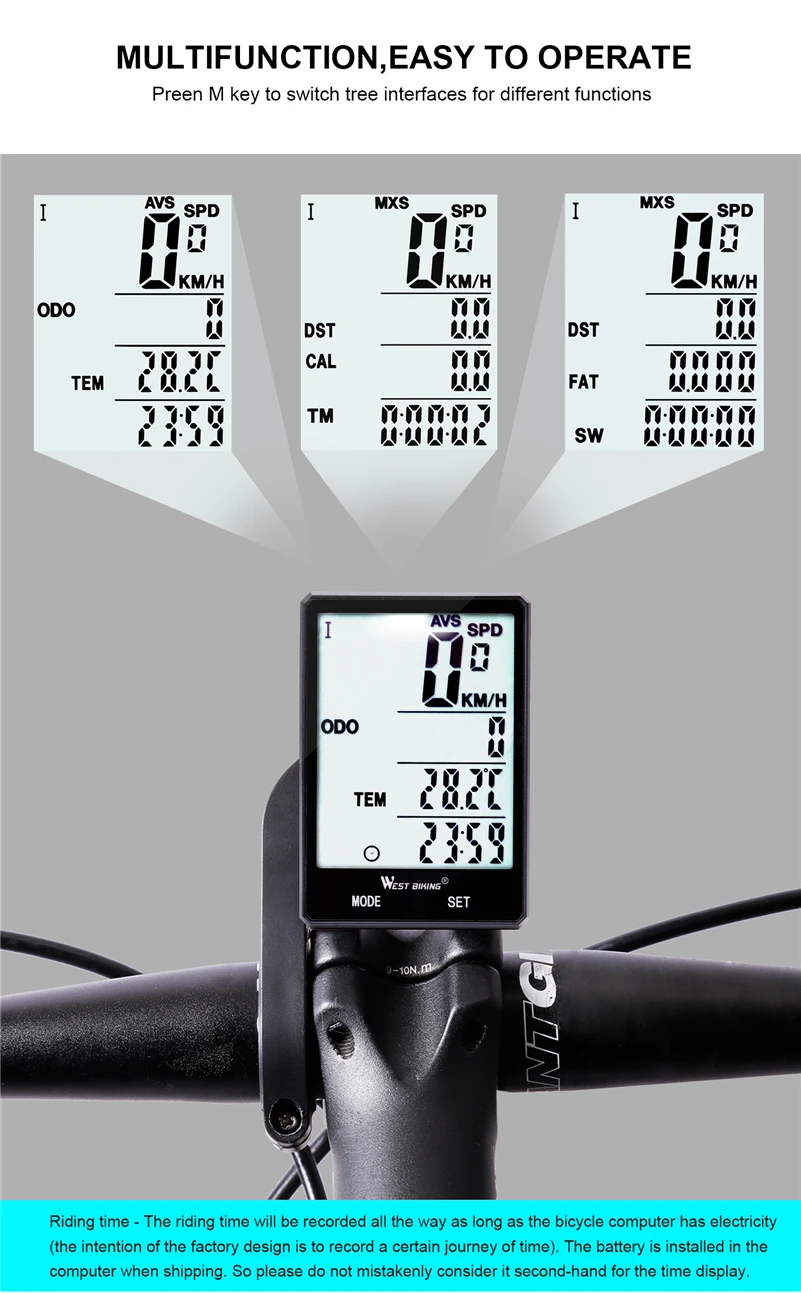
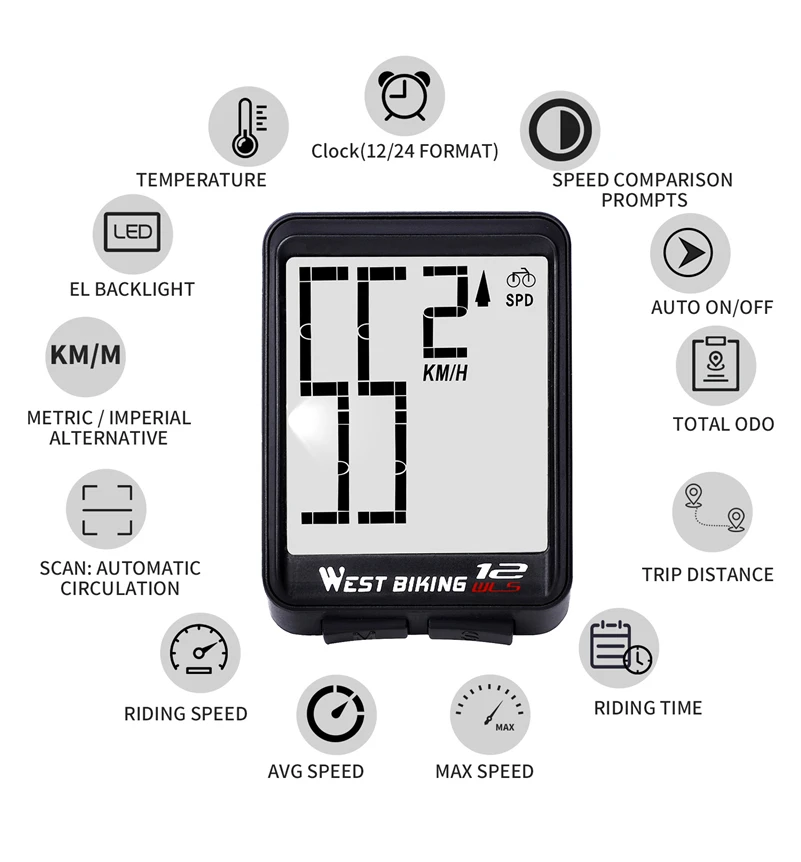
- Bike Computer Function: 20 Functions, Please See Details
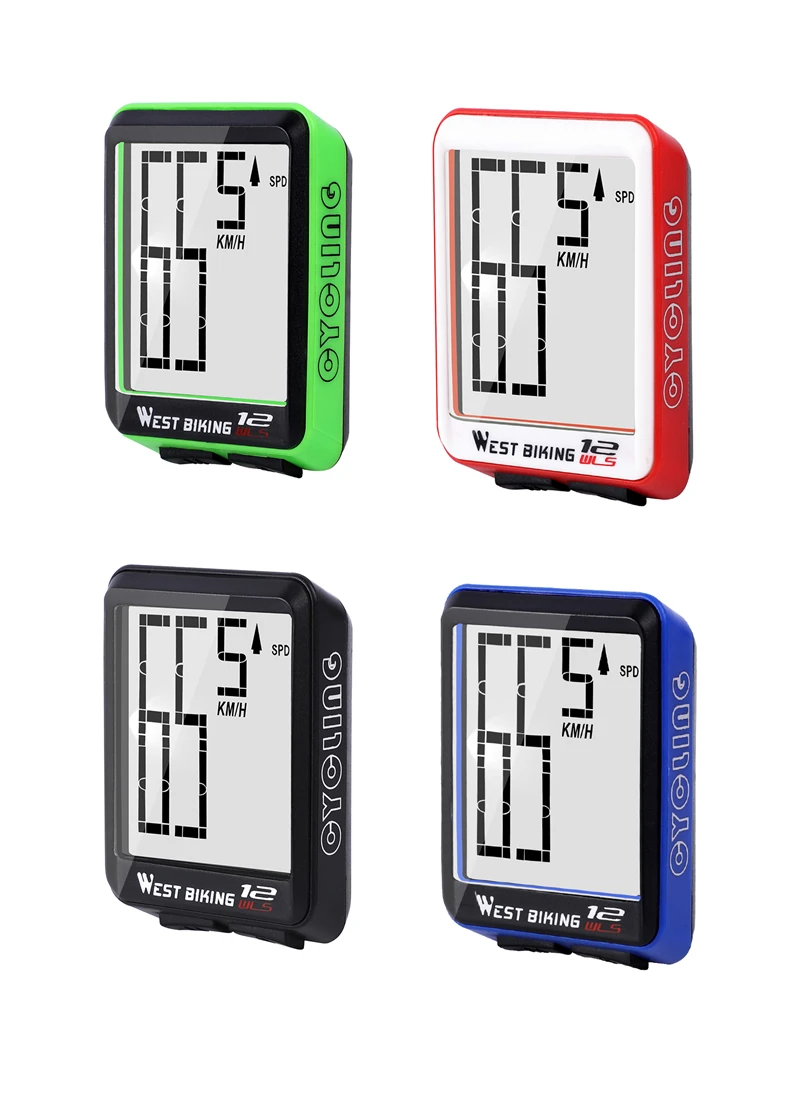
- Bike Computer Colors: Black
- Bicycle Computer Features: Waterproof, Large Screen, Multi-function, Strong Installation
- Application: MTB Road Bike / Fixed Bike


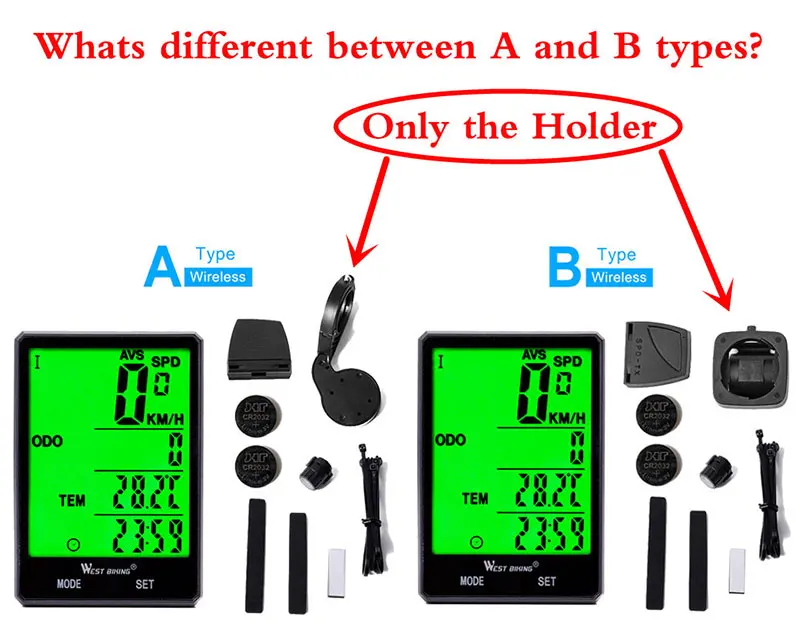
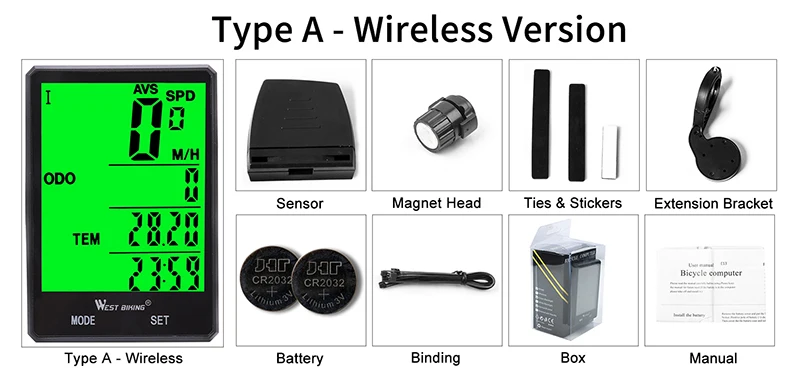
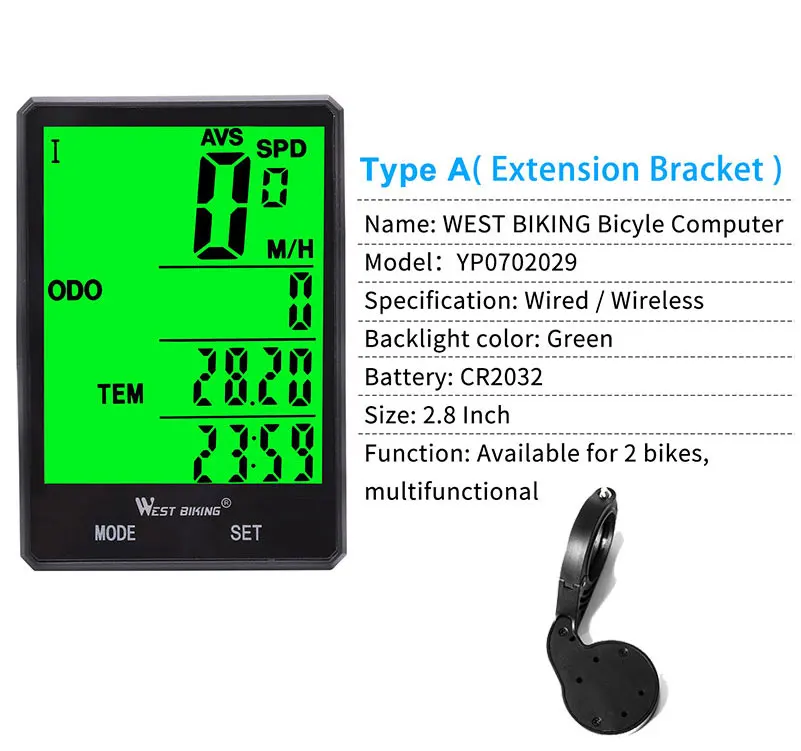
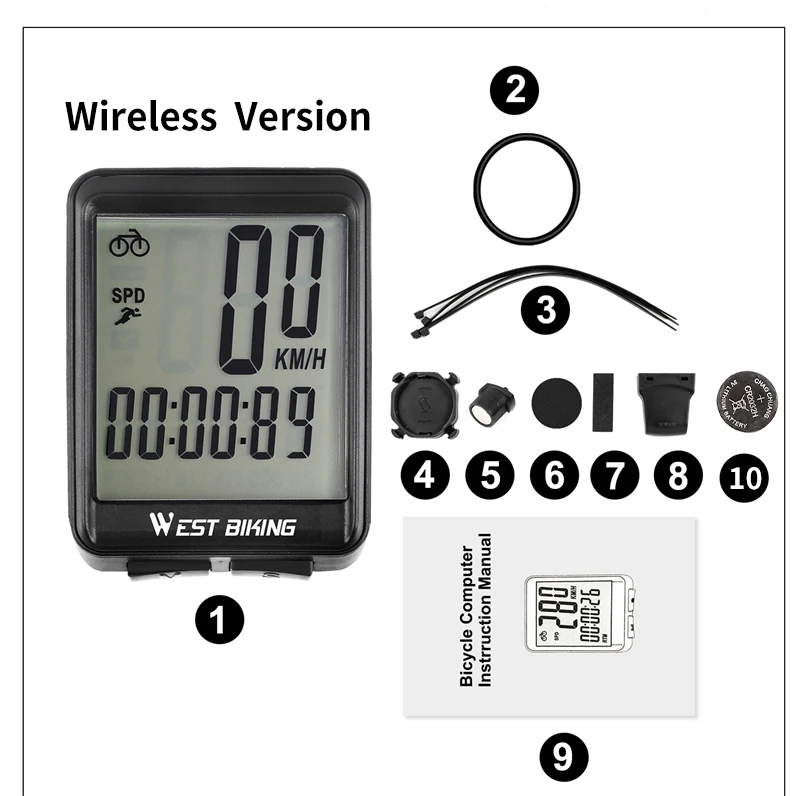
Type A - Wireless Version: Bike Computer, Sensor, Magnet Head, Ties & Stickers, Extension Bracket, Batteries *2, Binding, Box, Manual
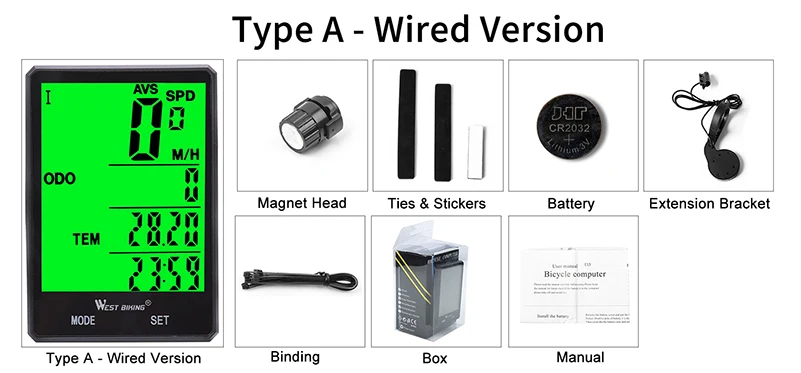
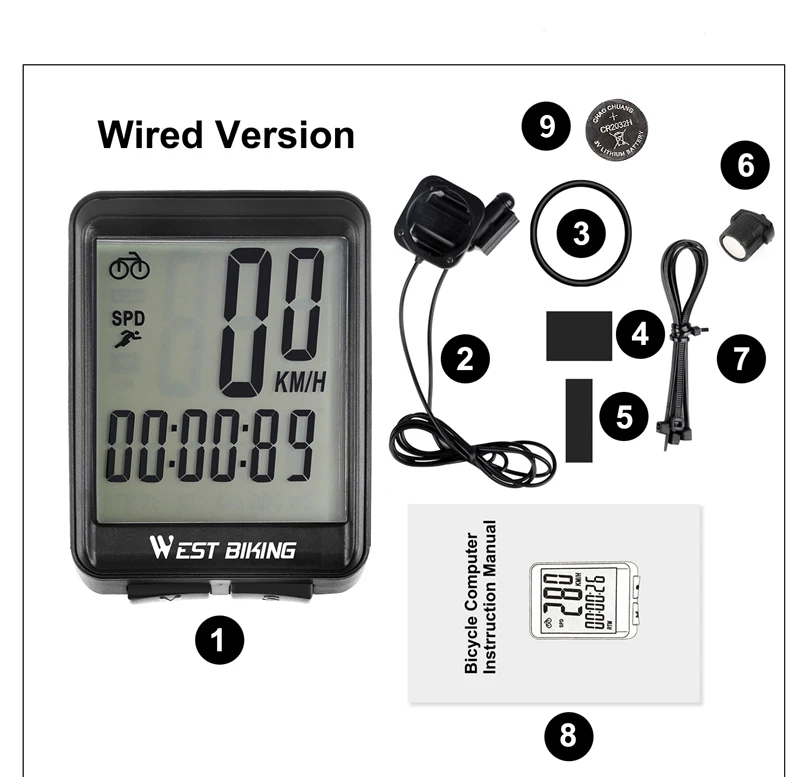
Type A - Wired Version: Bike Computer, Magnet Head, Ties & Stickers, Battery, Extension Bracket, Binding, Box, Manual
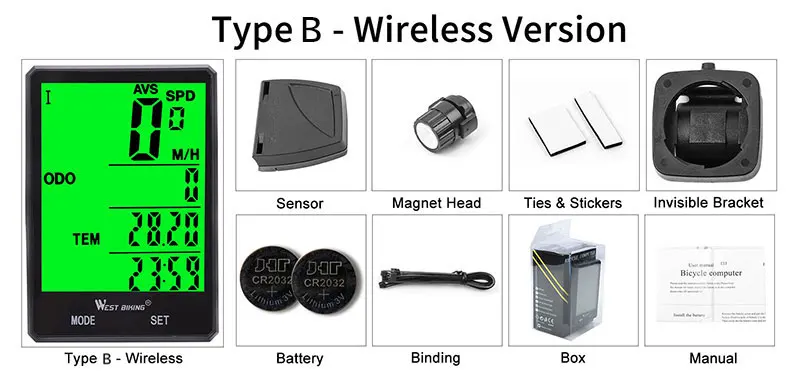
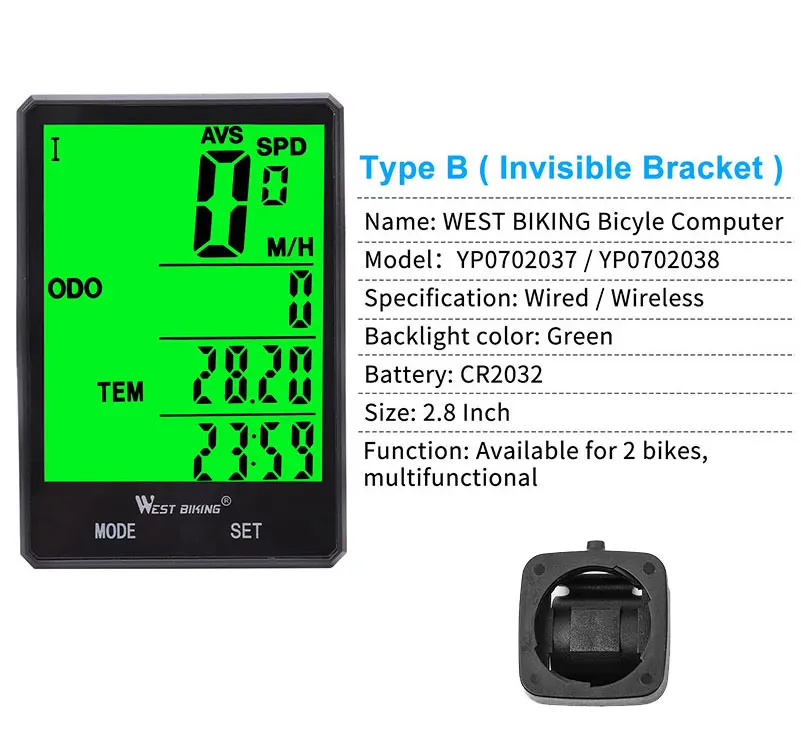
Type B - Wireless Version: Bike Computer, Sensor, Magnet Head, Ties & Stickers, Invisible Bracket, Batteries *2, Binding, Box, Manual

Type B - Wired Version: Bike Computer, Magnet Head, Ties & Stickers,Battery,Invisible Bracket, Binding, Box, Manual


![]()
Invisible Bracket


Setting Steps
1 Put the battery on - Setting KM, M, press SET button to choose and press MODE button to confirm. 1 mile = 1.609 km.
2 Wheel I perimeter setting, the screen shows 2060 (perimeter is 2060 mm). Setting the flashing number from right to left, press SET button to change the number and press MODE button to confirm.
3 Wheel II perimeter setting, the screen shows 1860 ( perimeter is 1860 mm). Setting the flashing number from right to left, press SET button to change the number and press MODE button to confirm.
4 Weight setting. Screen shows K065 and “K” flashing. Firstchoose Kilogram K or Pound L then setting the value. PressSET button to choose and press MODE button to confirm.
5 Bicycle I Maintenance setting, screen shows 0200, setting from right to left. Press SET button to change the flashing number and press MODE button to confirm.
6 Bicycle II Maintenance setting, screen shows 0800, setting from right to left. Press SET button to change the flashing number and press MODE button to confirm.
From now on you have finished the setting, and you can
ride your bike. Default bike is bikeI.If you want to reset
please press left and right key for 6 seconds at the same
time, and the steps are the same with above.
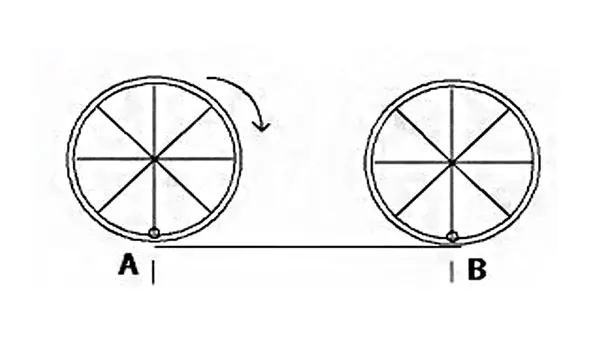
Tyre circumference setting and perimeter comparison
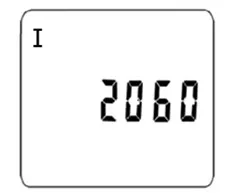
Wheel I perimeter setting,the screen shows 2060(perimeter is 2060 mm). Setting the flashing number from right to left,
press SET button to change the number and press MODE button to confirm.
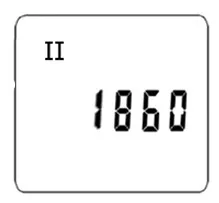
Wheel II perimeter setting,the screen shows 1860(perimeter is 1860 mm). Setting the flashing number from right to left,
press SET button to change the number and press MODE button to confirm.
ODO, CLOCK and TEM unit Setting
Under ODO - TEM - CLOCK mode, press SET button ODO flashing, press SET button again TEM flashing, press SET button again Clock icon flashing. When ODO flashing, press SET button for 3 seconds to set ODO value. Press the SET button change the number, press MODE button to confirm it, set from right to left number.
When TEM flashing, press SET button for 3 seconds to set the temperature unit. Press SET button to change °/°, press the MODE button to confirm it. When Clock icon flashing, press SET button for 3 seconds to set the date. Press the SET button to change time number, press MODE button to confirm it. Then press SET button to change 12H /24H, press MODE button to confirm it. Press SET button to change time number, press MODE button to confirm it.
DST,AVS, MXS, TM, CAL and FAT clear to zero
Under DST - CAL - TM or DST - FAT - SW mode, press SET button for 5 seconds to clear DST, AVS, MXS, TM, CAL and FAT value to zero.
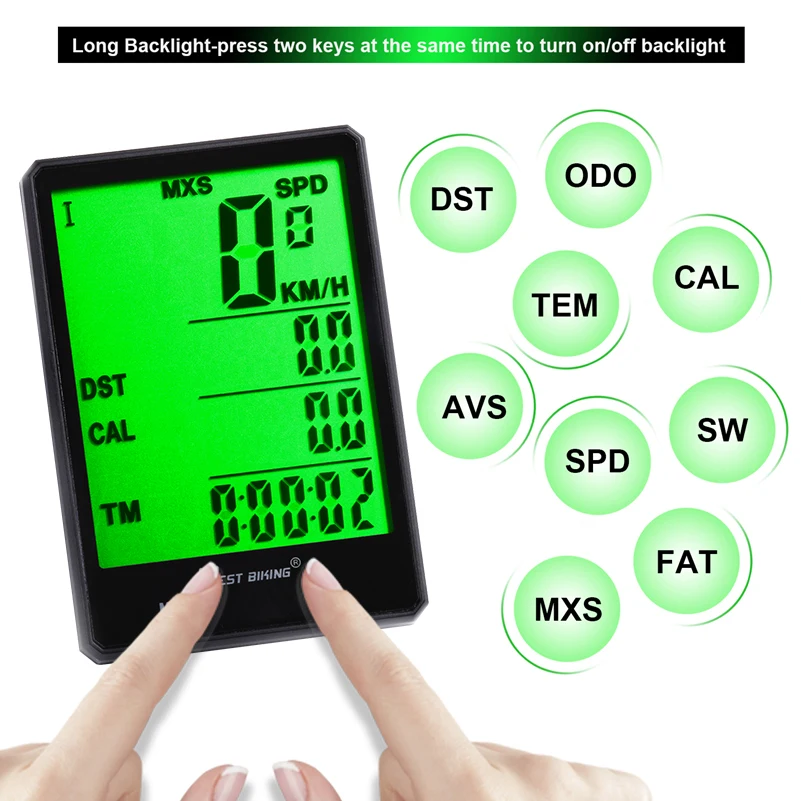
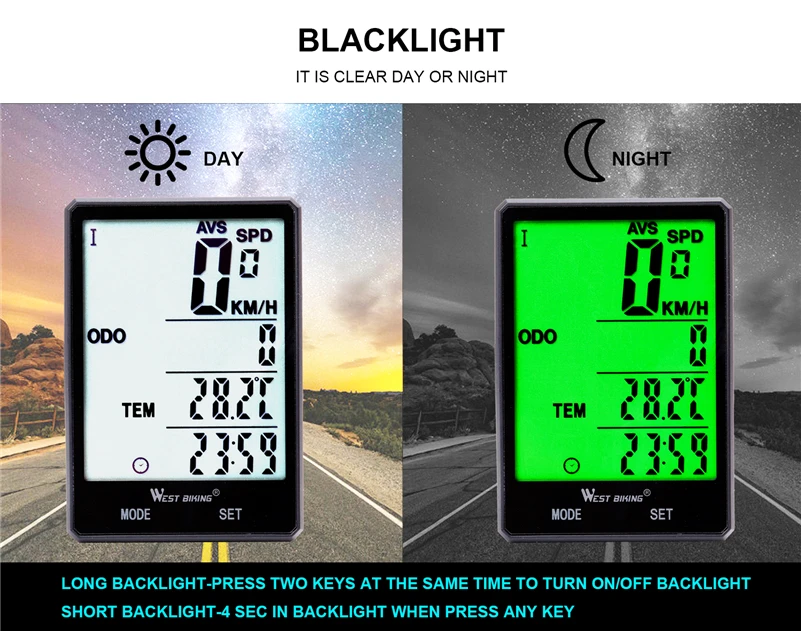
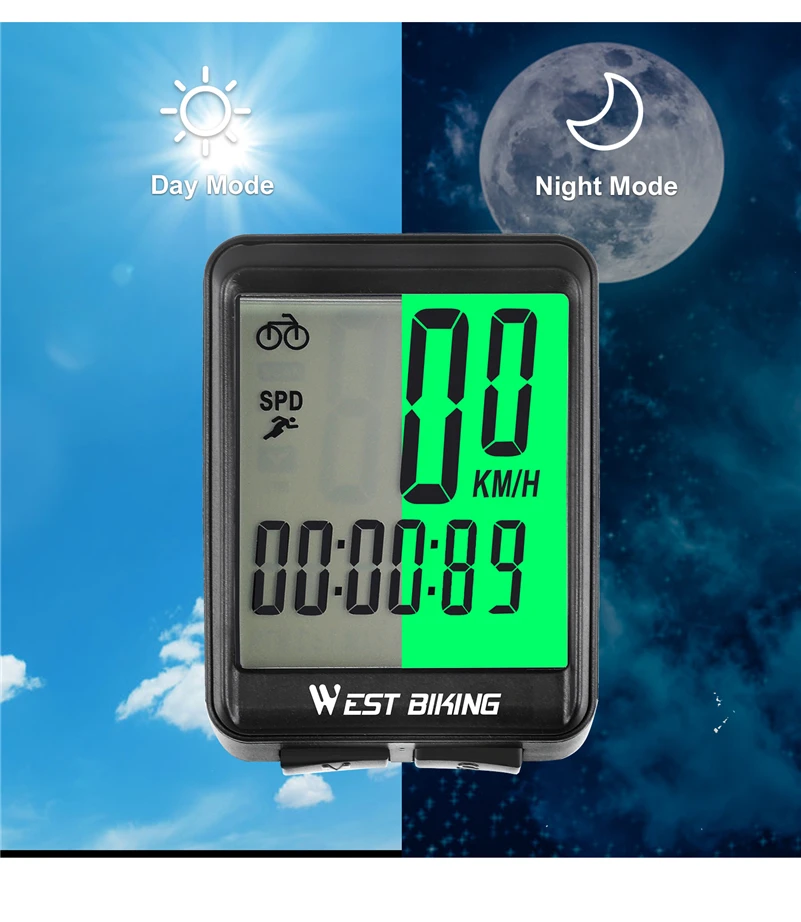
Backlight
During 17 :00-07 :00, screen will be lighted up for 4 seconds
when you press any key. But if you want the screen always
lighting at any time, press both SET and MODE button for 1
seconds to keep the screen always lighting up. Press SET and
MODE button for 1 seconds again to cancel it .
Stop watch
Under DST - FAT - SW mode, press SET
button to start Stop watch press again to pause,
then press MODE button to clear to zero.
It ranges from 0:00:00 to 9:59:59.
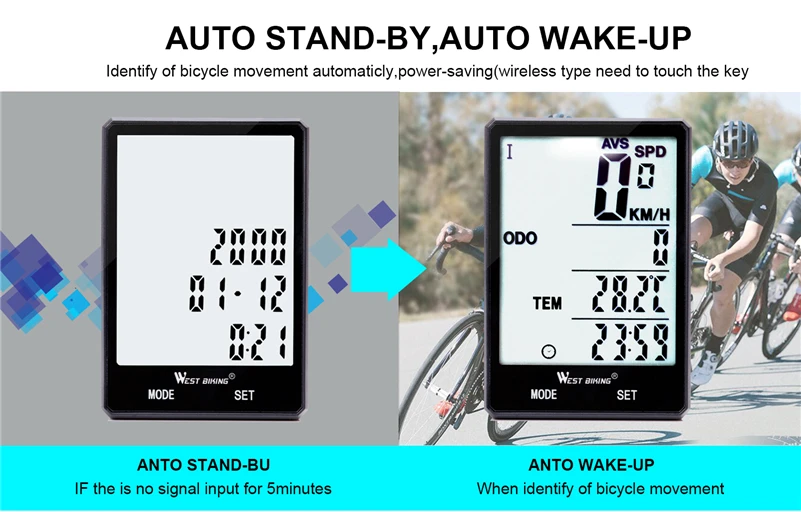
Auto off
After 300 seconds no signal inputs the computer, the screen will turn into OFF state with only clock and date display. It will be restart when you press any button.
Maintenance Alert
Under ODO - TEM - CLOCK mode,when distance value reaches to the maintenance setting value, the spanner icon will be flashing in the screen,press the SET button for 3 seconds to cancel it.
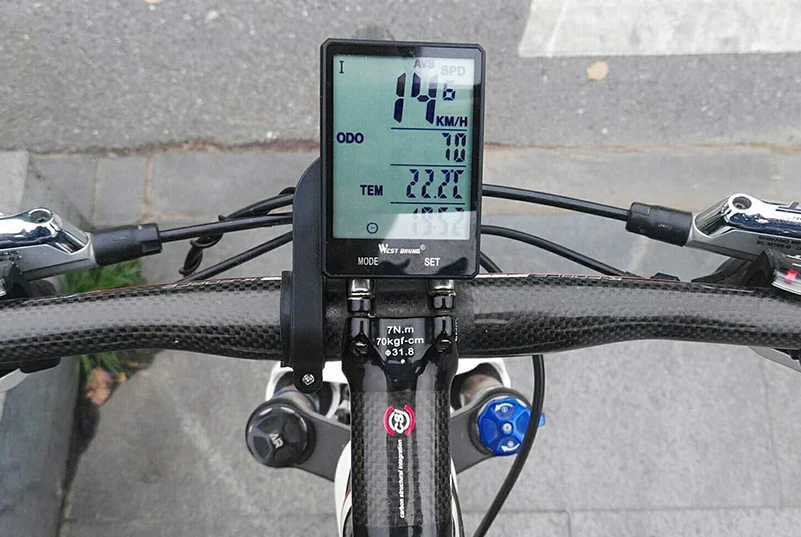
Current speed
Screen will show current speed only when you are riding. Precision is 0.1KM/h. Range at 0~99.9 KM/h (M/h).Screen shows MXS or AVS when you are not riding
Speed tendency
Screen will show a tendency when you are riding. Speed up, it goes high. Speed down, it goes short.
Low power indicator
Once the battery voltage decreases to 2.5 V, the blank battery icon will be flashing on screen, that reminds you to change a new battery.
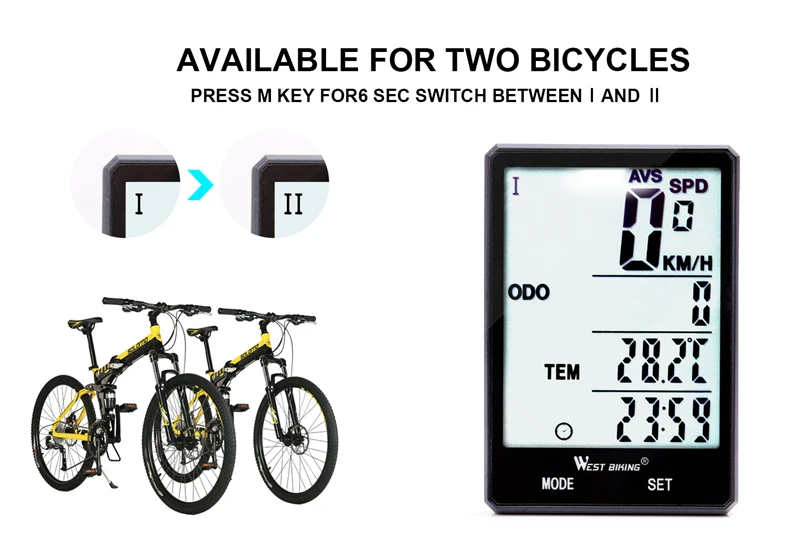
Two Bicycle I / II using
Under any mode press MODE button for 6 seconds to change to another bicycle mode.
Resetting
Press both MODE and left Button for 6 seconds to reset KM /
M, wheel perimeter/ weight / maintenance.
Memory function
All cycling and setting data will be kept after changinng a battery.
Because of this, the computer haven't cleared to zero before sending to you.
--------------------------------------------------------------------------------------------------------------------------------------------------------------------------------------------
--------------------------------------------------------------------------------------------------------------------------------------------------------------------------------------------
D Mini Style
Bike Stopwatch Features:
1. Made of premium material, lightweight, sturdy and durable.
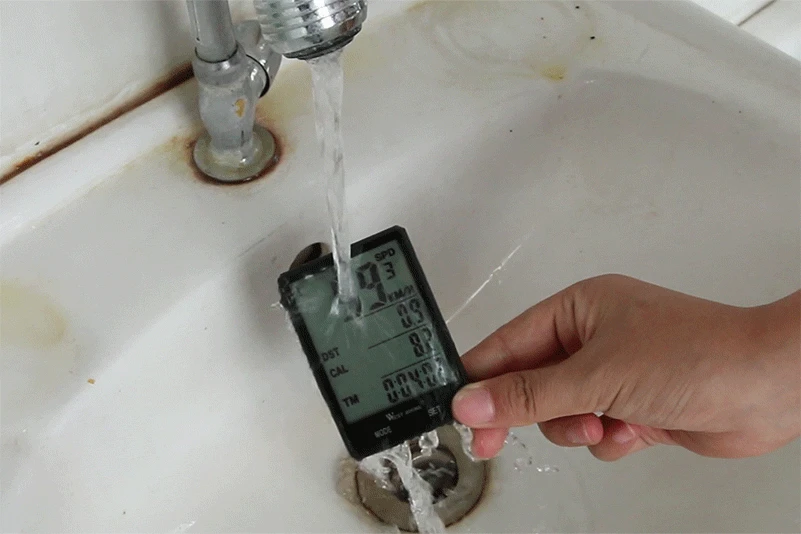
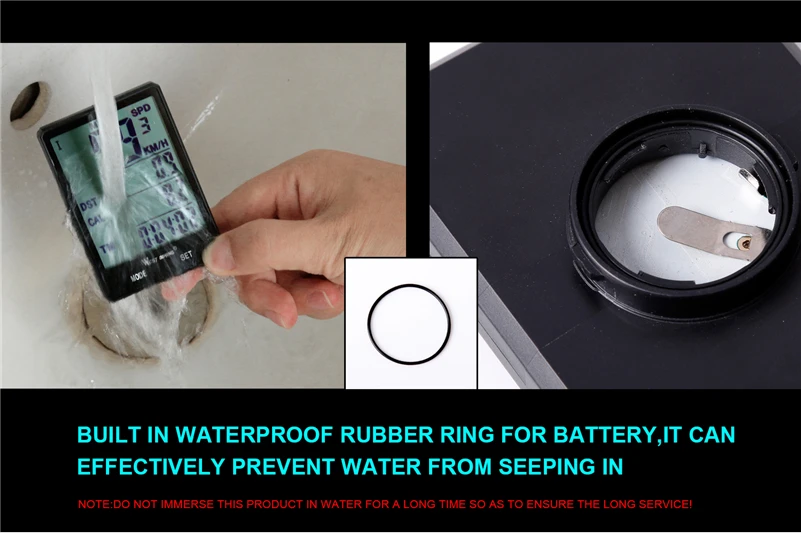
2. Waterproof rubber ring to ensure safe use in rainy days.
3. Displaying time, average speed, maximum speed, distance, etc.
4. Easy installation on your bike and motorbikes.
5. Ideal for riding lovers.

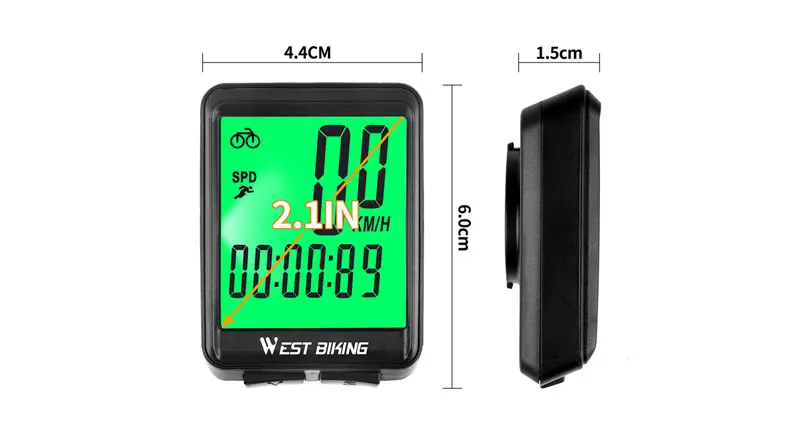
Specification
Size:6.0*4.4*1.5CM/1.73*0.24*0.59inch Specification:Screen size 2.1inch Application: MTB Road Bike Battery: CR2302 button battery Waterproof:Daily waterproof Feature: Backlight, Multifunctional, Easy to use
Accessories of Wired Version:
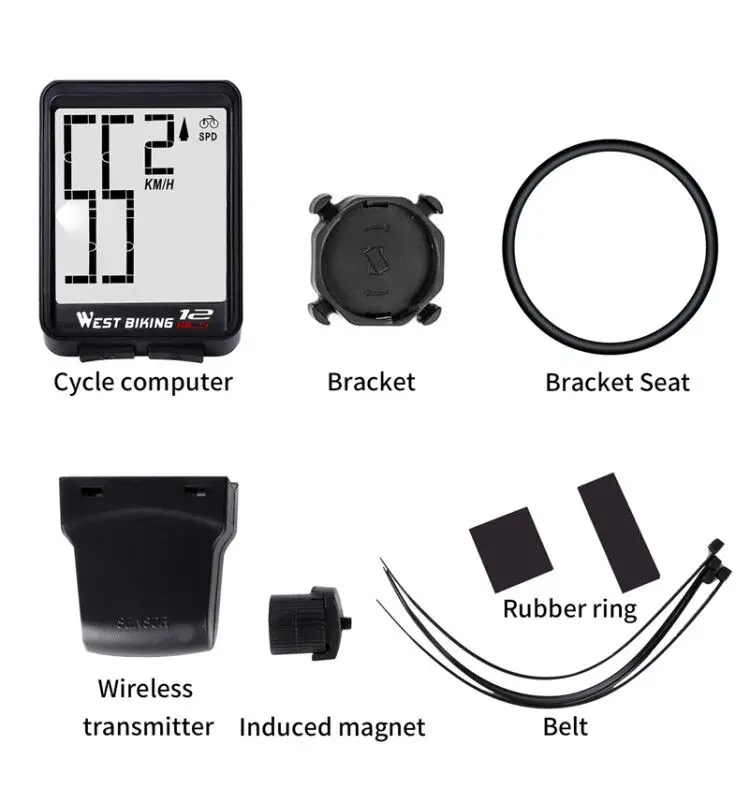
1.bike computer 2.nylon belts*7 3.shake-absorbing sponge pad 4.rubber loop 5.wired launcher 6.shake-absorbing sponge pad 7.button cell 8.strong magnet 9.English version instruction
Accessories of Wireless Version:
1.bike computer 2.nylon belts*7 3.shake-absorbing sponge pad 4.rubber loop 5.wireless base 6.shake-absorbing sponge pad 7.button cell 8.strong magnet 9.wireless launcher 10.English version instruction
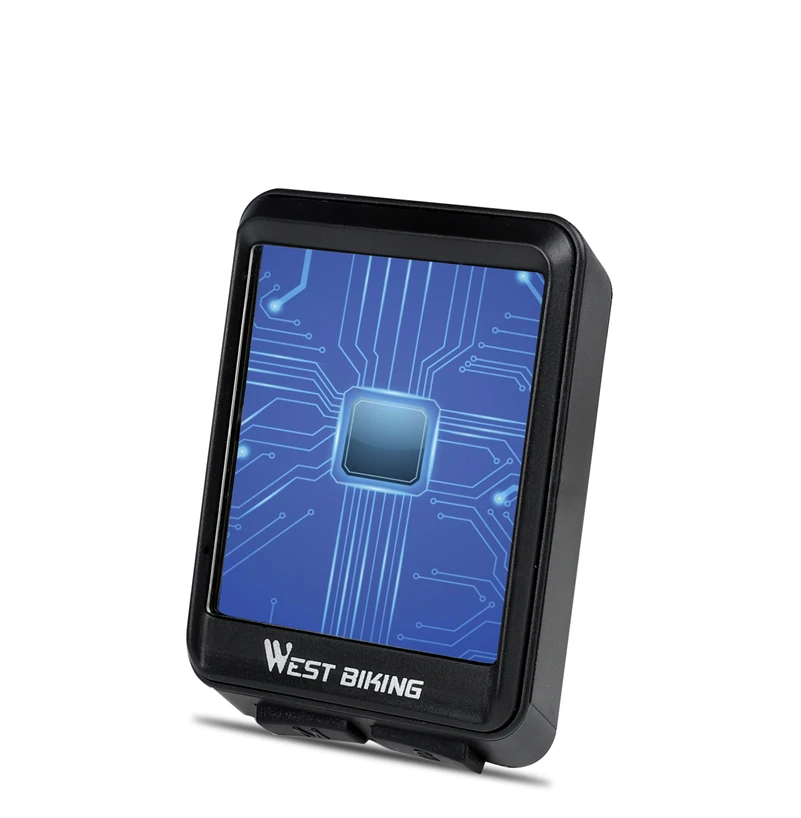
Powerful function, easy operation
Multiple functions, meet all your cycling needs

Daily Waterproof
Do not put the product into water or get wet in the rain for a long time. Cover a plastic warp when there is a bad weather.

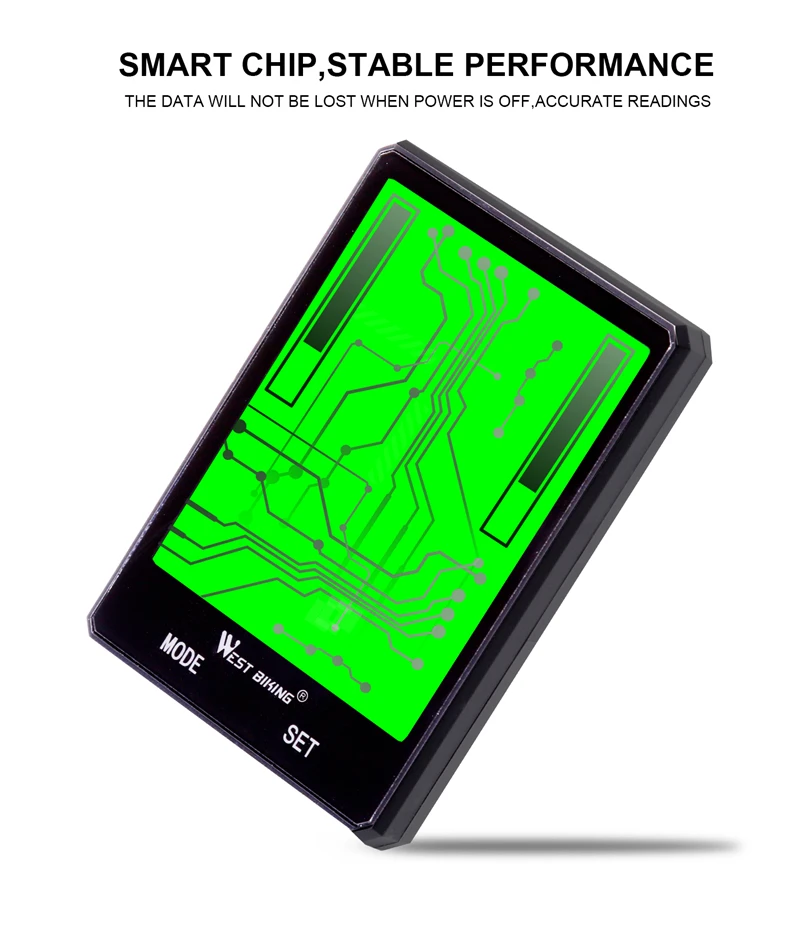
Smart microcircuit, stable function
-Automatic memory and updated every weekly -Powerful microcircuit; more stable function more correct data; longer service life
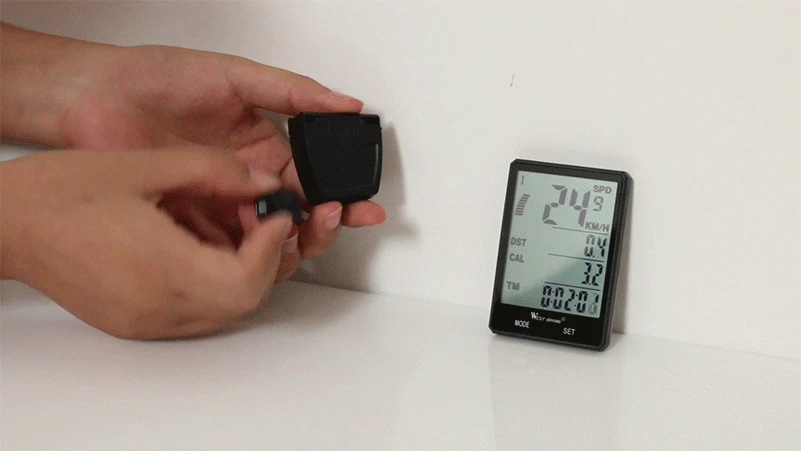
Standby / wake-up automatic

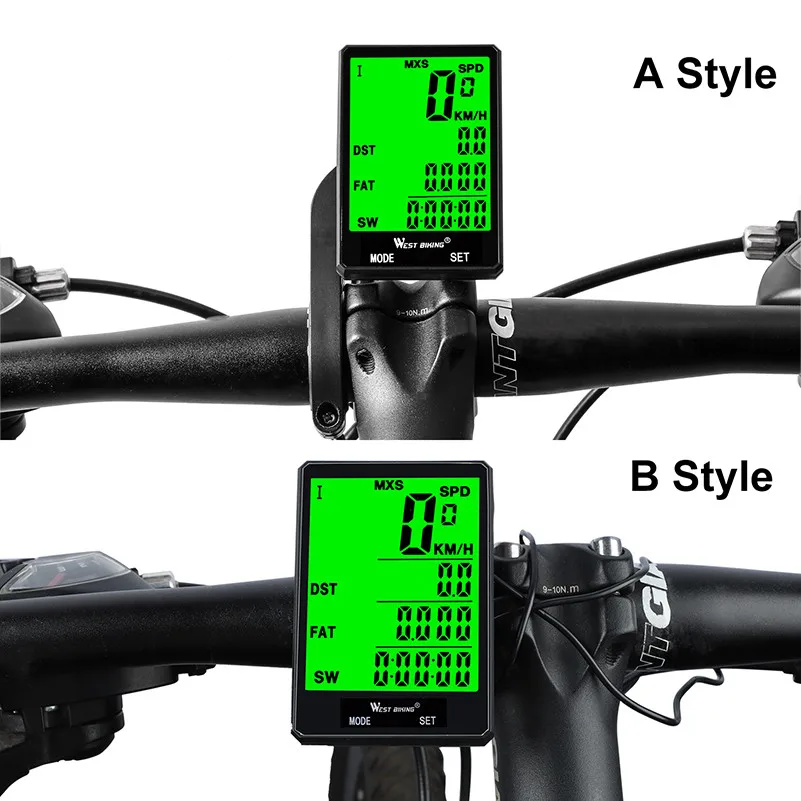
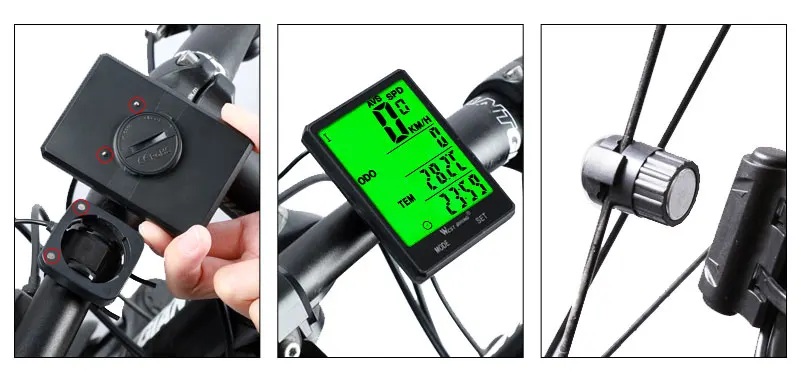
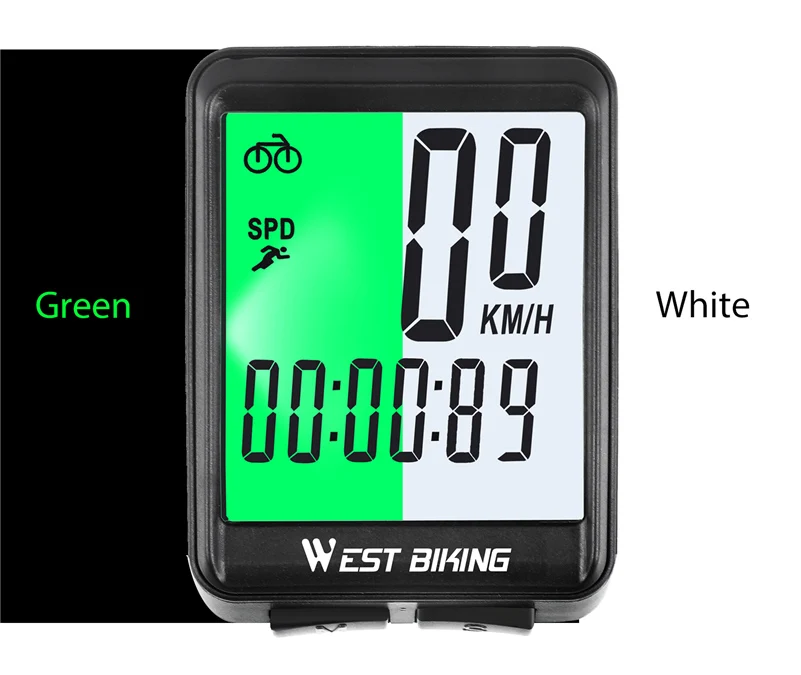
Two backlight colors for your choice!
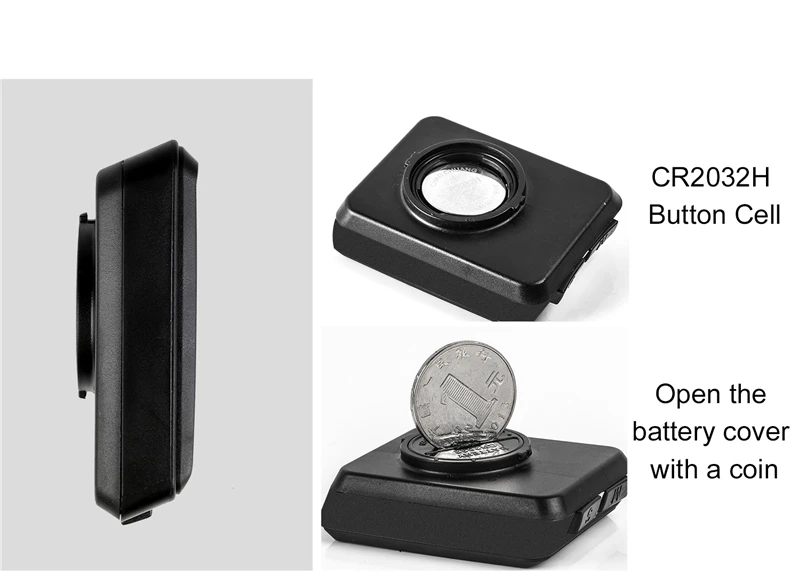
Long battery endurance, low consumption
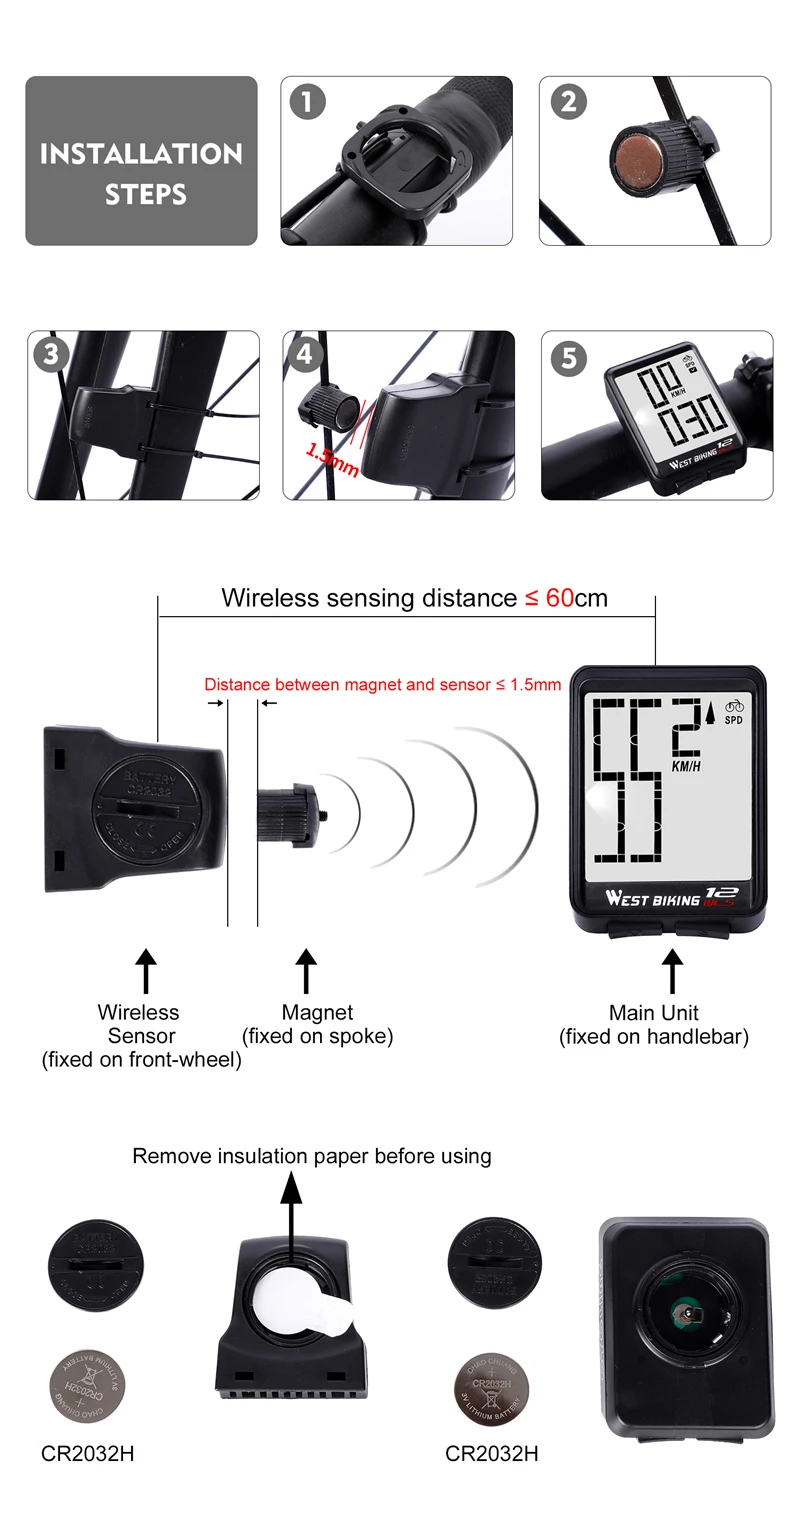
Only one 2032 button cell, low consumption and long endurance Open the battery cover with a coin Please take out the insulation sheet in the product before using.
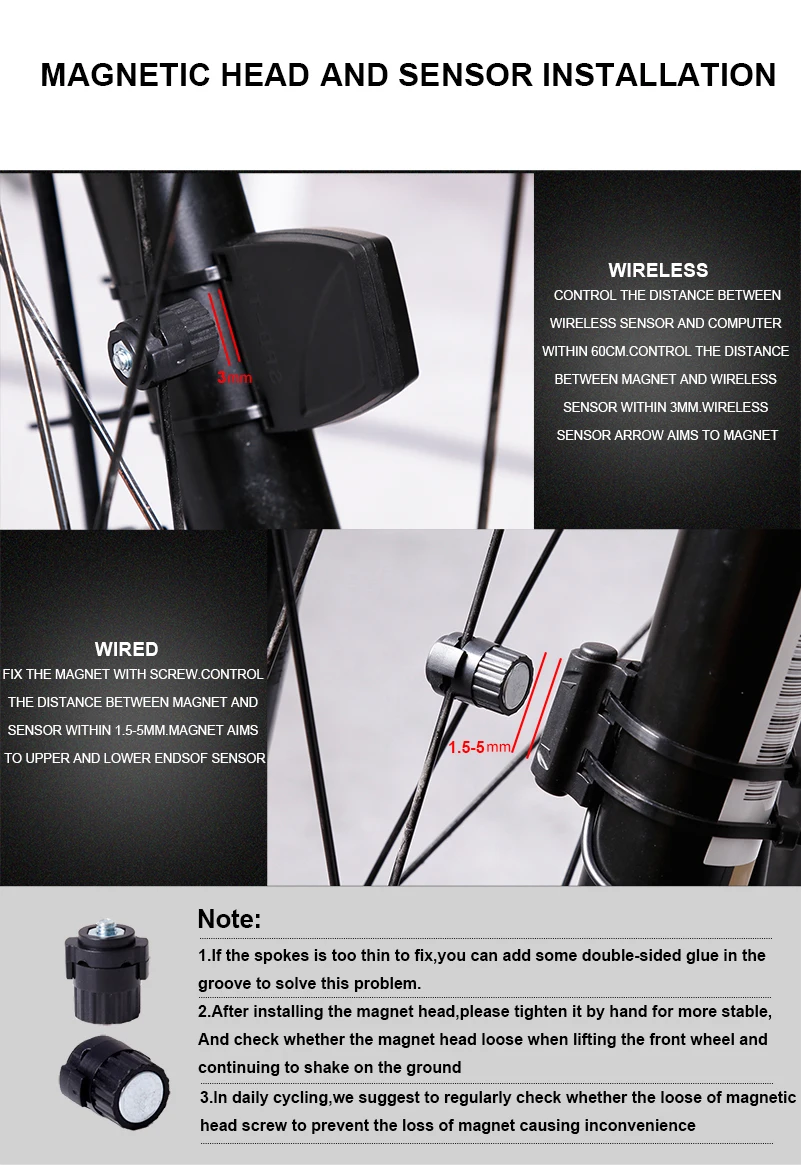
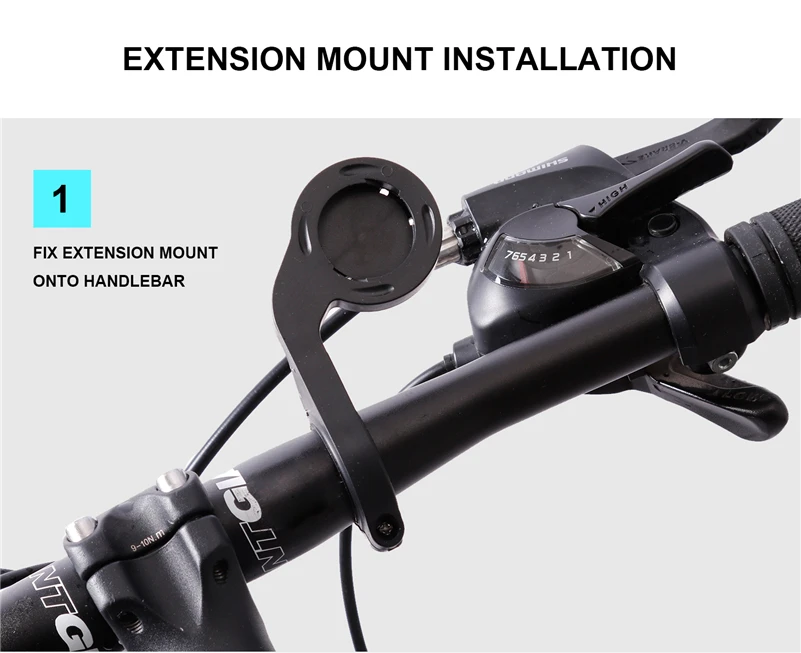
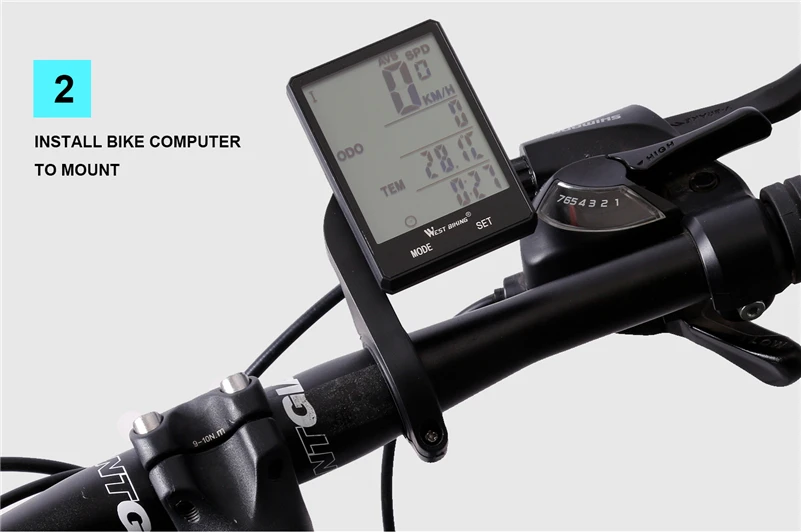
Bicycle Computer Installation
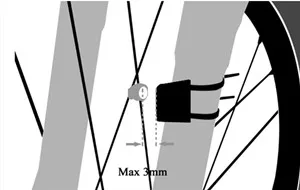
1.Attach the base to the handlebars 2.Fix the monitor to the base 3.Loosely attach the magnet to a spoke 4.Attach the wireless sensor using the wraps 5.Adjust the distance between magnet and sensor to within 3mm 6.Setting date
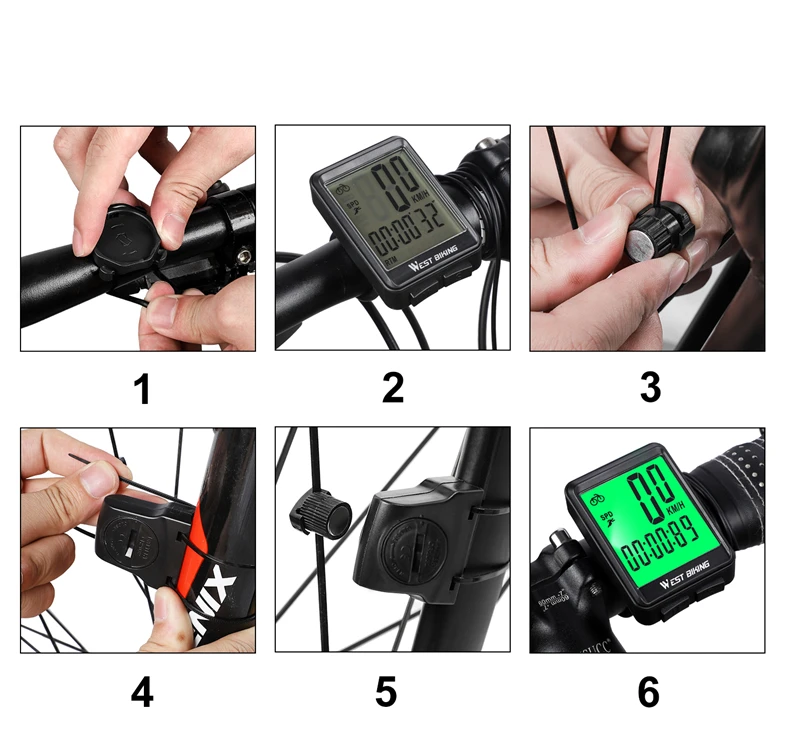
Distance Between Magnet And Sensor < 3MM Distance < 60CM(Wireless Sensor Fixed On Front Fork)

E Type
Payment & Security
Your payment information is processed securely. We do not store credit card details nor have access to your credit card information.